Manitowoc County Historical Society volunteer Bill Pauwels has worked on many site projects over the past decade. He rectently took on the restoration of an old four mill. This is the mill’s restoration story:
I've had my eye on this as a unique restoration/rebuild project just because it was so different. Being small enough to fit in a small heated workshop, but needing a lot of work, creativity and research into some new skills (mainly stone dressing) all appealed to me. While impossible to tell, local ag history buffs believe it came from one of the early Calumet County/Chilton area breweries, and "migrated" to Manitowoc County via the late Art Terens...but most of this is a guess.
Many of the pictures show a lot of rot and modifications to keep it operating over the years, and certain things, like a steel skirt and plywood top for sure didn't match its age. Eric Sloane books were of the greatest help in reconstruction, as well as a couple of videos of still operating, but much larger mills from out east. By far, though, was a film made in the mid-fifties showing a British fellow in his eighties dressing a mill stone, and explaining his technique as he went along.
Making the mill look good, but old, and have some protection against the wood worms that reeked so much damage to it, is the age old boiled linseed oil mixed with a stain, then rubbed down with fireplace ashes to age everything. The only items to get special treatment were the sampling door and grain bin on top...as I've read, they were always painted and pinstriped, so the same was done here.
Since we do intend on running grain through the grist mill, provisions were made to quickly disassemble the lid and skirt so we can quickly and thoroughly clean it out. With any luck, we will be able to put this mill back to the job it was meant to do.
Click on the images for a timeline view and restoration story.
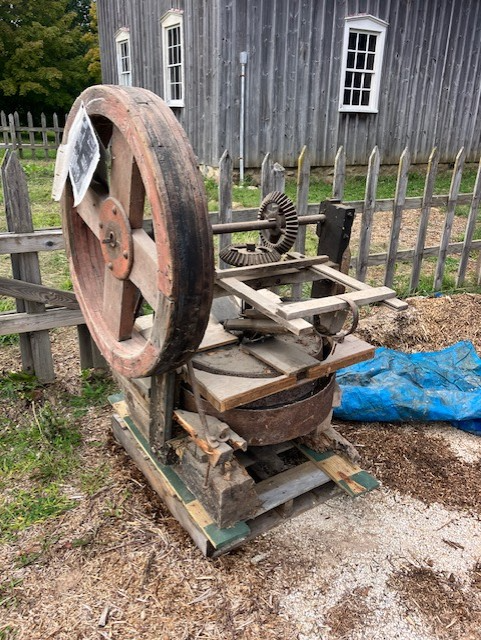
As removed from Machine Shed at MCHS. Picture shows it being operated by Wyman Boetcher's engine at the Chilton Steam Engine show in 1969. Art Terens of Manitowoc owns mill at this point.
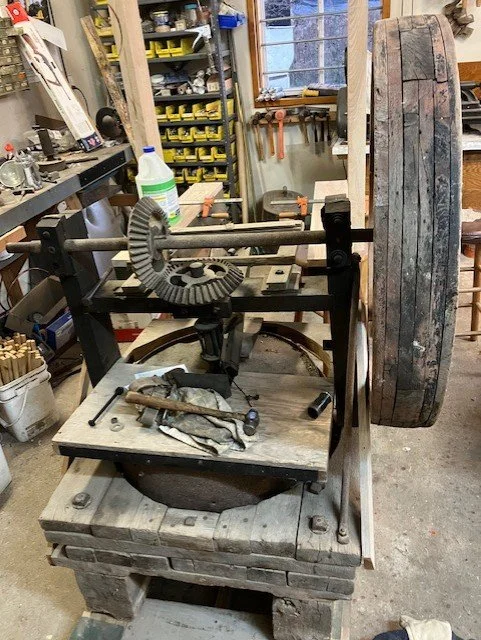
Start of tear down. Skirt ("wall" around stones) is made of sheet metal and a plywood deck. Lots of evidence showing braces and extra wood added over time to keep unit working.
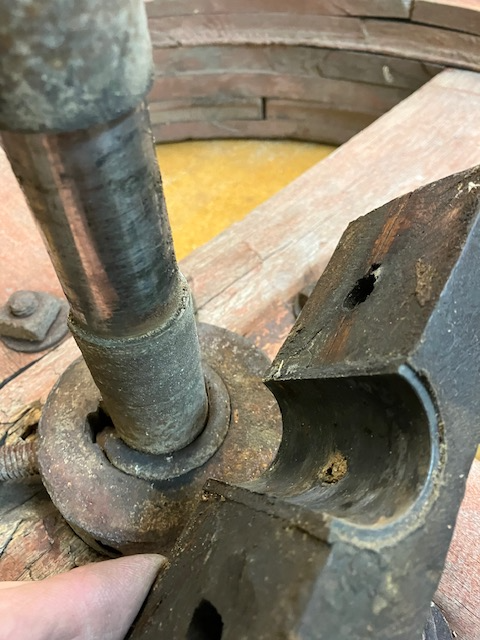
A nice feature is a shelf cut on the main shaft to keep shaft centered on bearings. Bearings are poured babbitt, using an oak block as bearing housing and drilled for an oiler hole.
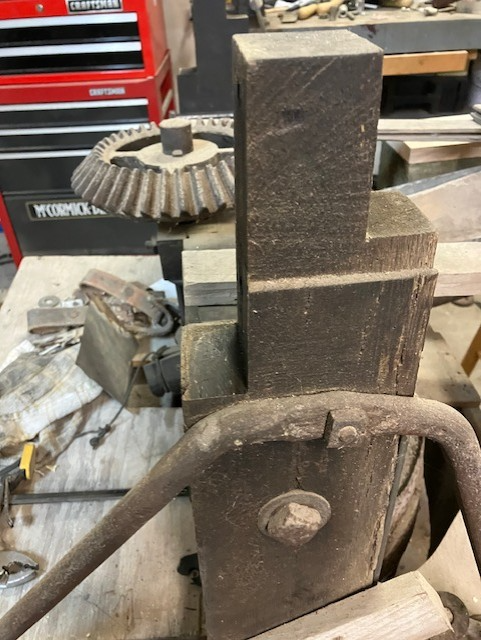
Shaft bearings mount to these vertical posts, which are rotted off on the bottom. Bearing blocks can be shimmed against these posts to make alignment adjustments. The shelf bears the weight of the shaft assembly, which has a mating gear to drive the damsel (vertical shaft and gear) shown in picture.
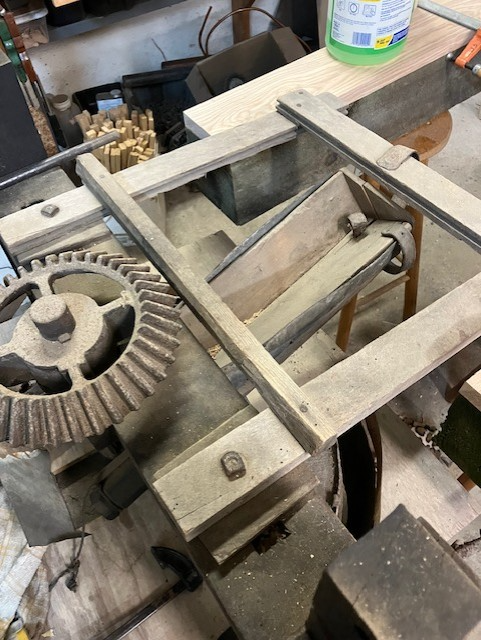
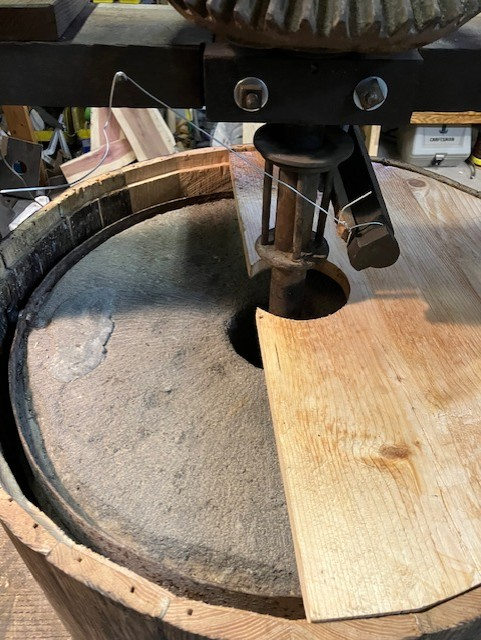
Here is the framework that holds up the missing grain bin. Below is the chute that directs/slides the grain into the stones. It is held tight to the damsel wheel by a leather string. As the damsel wheel rotates, it taps the chute, helping to regulate the flow of grain.
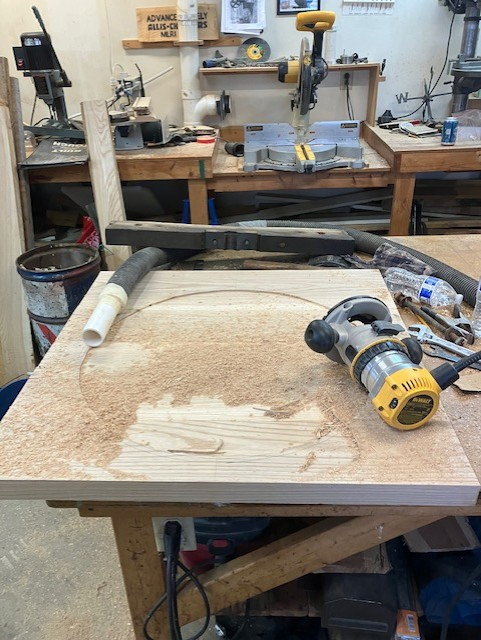
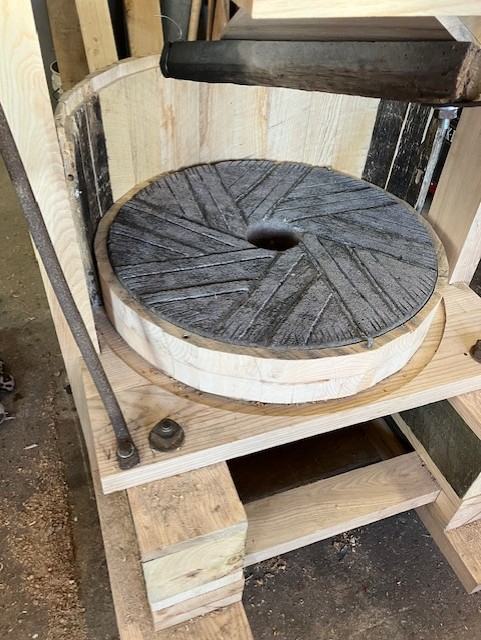
Making a new base for the bottom, or base stone. Base stone is usually cemented into place, but in this case, a recess was routed into an ash base and construction glue will be used to mount stone, just in case future removal is needed. Base stones are typically redressed, or sharpened, while in place.
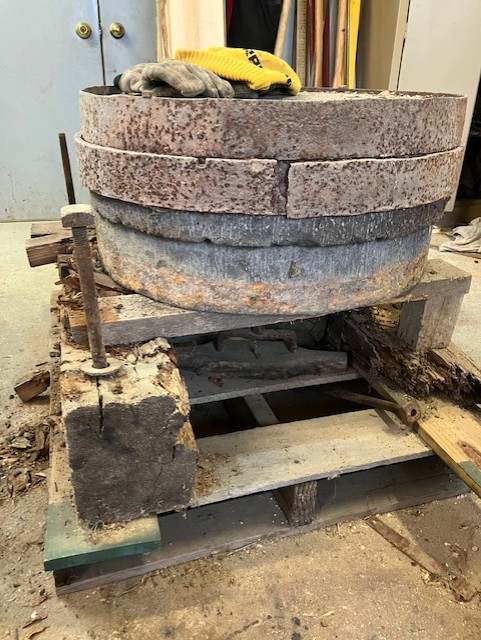
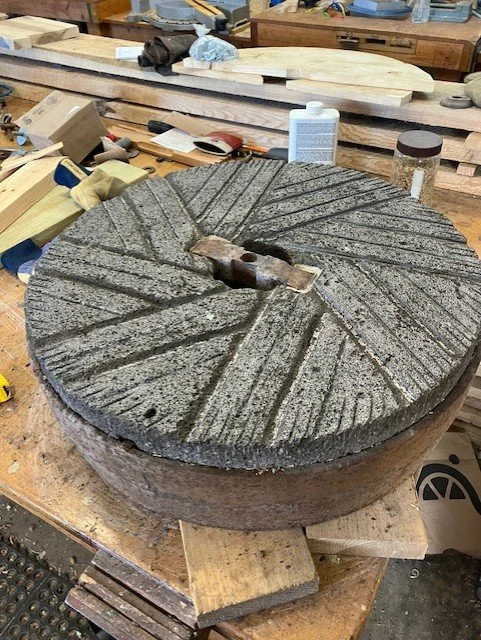
Here is all that is left of original base...between rot and wood worms, there is not much left. The two metal bands surrounding the run stone (top rotating stone) helps stone from flying apart while rotating at typical 150 rpm and can hold multi-segmented stones together by heat shrinking like a wagon wheel. The notch you see on the top edge of the bottom wheel is where a set of tongs from a wooden crane in the mill building would latch onto stone to remove and flip it over for re-dressing. The bottom ring has a broken forge weld, which was MIG flux core welded in place after strapping band tight with a ratchet strap. The new base was made to the size needed to re-use the original bolts seen here.
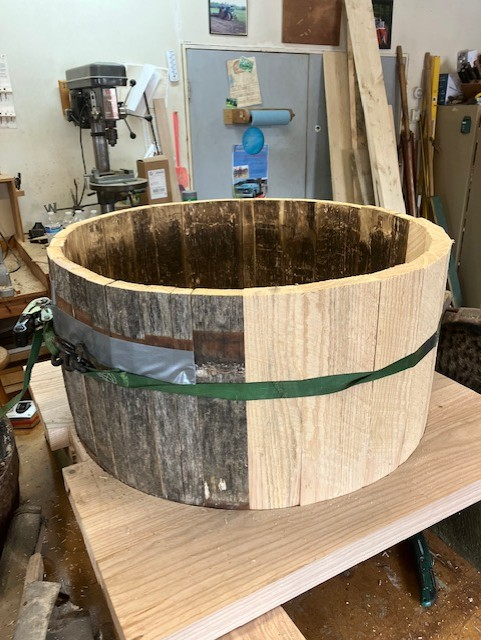
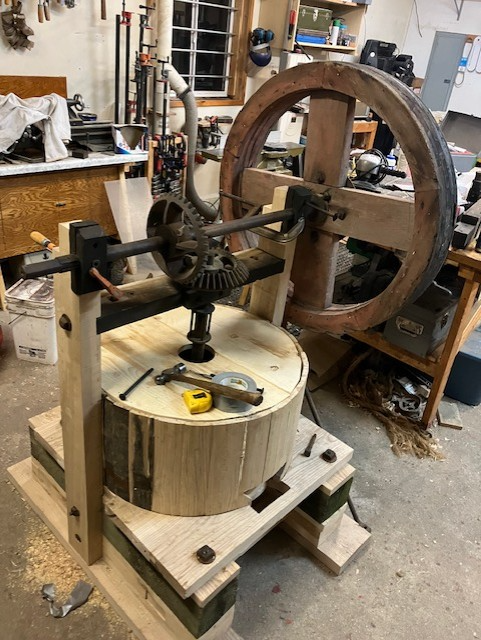
New base roughed out with notches to recieve vertical posts that support shafts. An oak barrel from Pine Crest served as pattern to make a new skirt. Made in two halves to be removable for servicing the stones. Inside of barrel is two inches larger in diameter than stones to allow for a sweep rod to be mounted to side of run stone, to push grist/flour to drop hole.
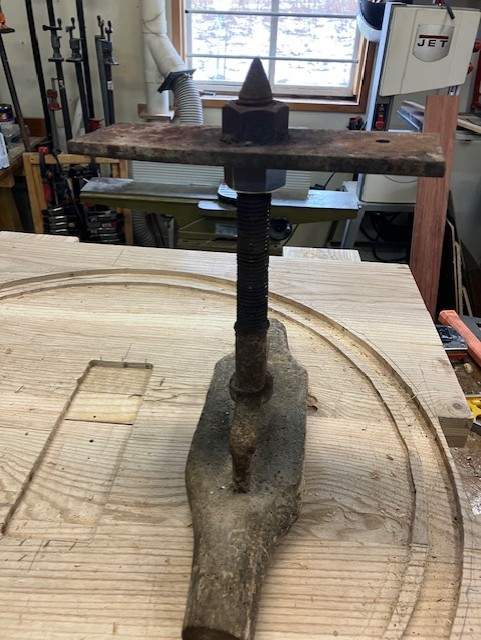
Close up of the balancing rod. Base plate is flushed into base underneath base stone. Wood handle is one of the few original pieces not destroyed by wood worms. Metal plate with welded nuts was likely made by Art. This tip engages cross bar that is embedded into run stone. Concentric groove outside of routed in recess for base stone is what secures skirt in place without tools.
Initial mechanical set up. This required making new shims from thick paper to set babbitt bearing clearance. Flywheel and wood cross bar are two other wood parts that were usable. Flywheel is well built, with a crown turned into it and balanced. Directly above removable skirt cover is the damsel wheel, which looks like a bearing cage. The damsel wheel and accompanying shaft is still in place at the Clarks Milll dam site. The gear on the horizontal shaft is installed with a jib key, which was very difficult to get loose, which allowed me to slide this gear into a better mesh with its mate. In front is a hole for an observation port, which the miller would open this door to take a handful grist to determine if any adjustments needed to be made. From here, grist would go to an auger to be transported up to sifting screens for different grades of flour (flour, grist and bran) while being dried along the way. We will not be set up to do this, so door is added for show/explanation purposes.
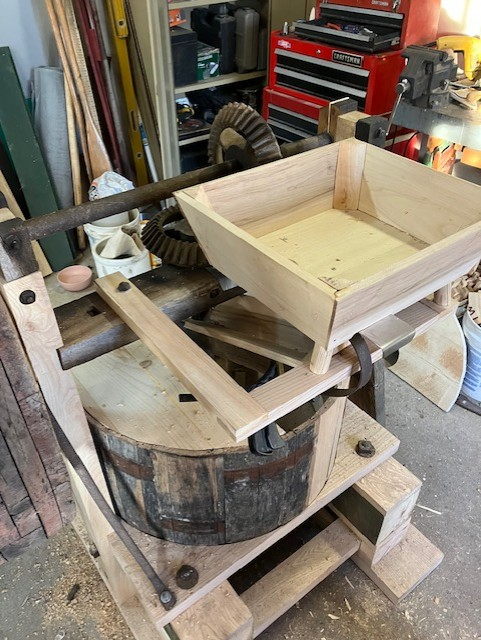
Building the four-sided, tapered grain box. These were typically painted and pinstripe. A sliding blast door was added to control how much grain we want to have go in at a time.
New grain box fitted to new frame, with grain chute suspended, original "spring hinge" which allows damsel wheel to shake chute.
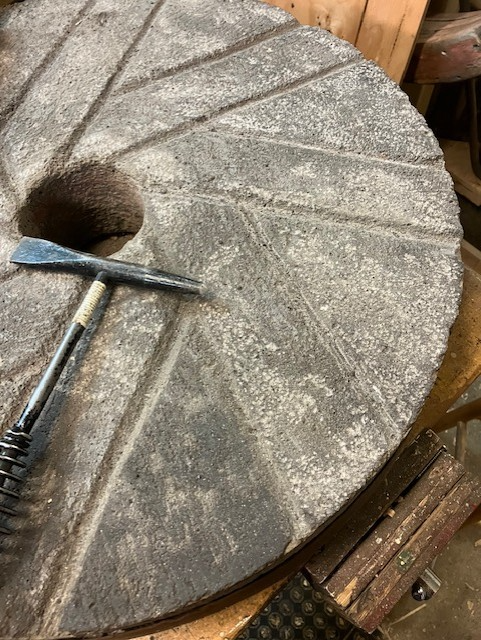
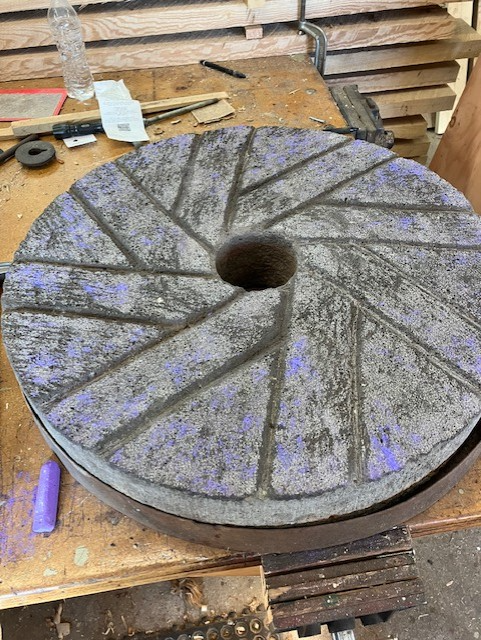
After using a straight board called a straight staff, which is initially coated with boiled linseed oil and ash, the board is struck across face of stones to find high spots, as is shown by heavy dark spots. These are high spots and are removed with a facing hammer. Since I don't have one, a welding chipping hammer served the purpose. A few videos showed using a grinder to do this, but this tended to polish stone, instead of chipping off the surface, which reveals new cutting edges.
After using chipping hammer, you can see the small white dots, which are newly exposed stone faces, which are now at the new level height. It is really impressive how material chips off if you hit stone consistently.
Here is inital leveled surface. You can see newly exposed stone faces (white), and worn/polished surfaces we need to dress yet.
Using California hammer to dress mill stone: I was unable to find a Miller's dressing hammer for a reasonable price, but a California style, modern hammer is nearly exactly the same...it just does not have a square face. Firm, straight-on tapping removes polished stone face revealing new cutting surfaces.
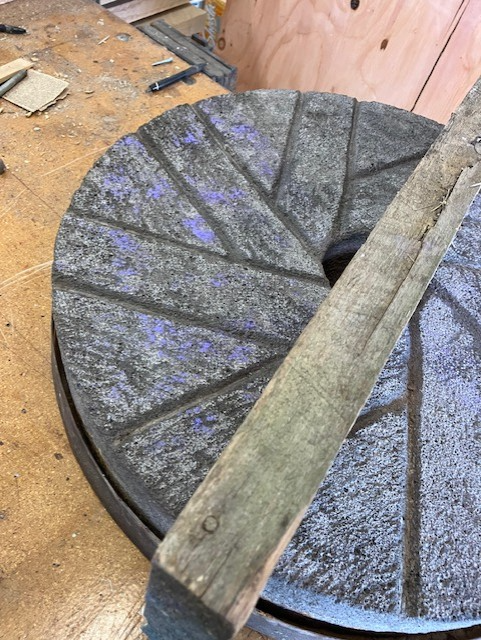
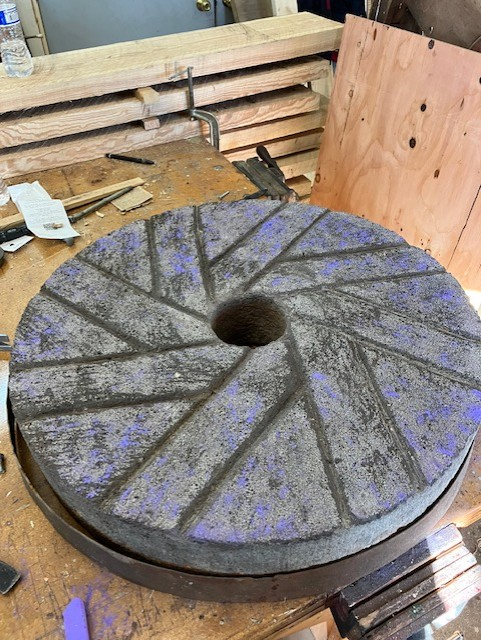
Using paint staff to check flatness: Using the paint staff with chalk this time, several cycles of striking and mill hammering took place to resurface entire stone and keep it flat. I learned this from watching a film made in England in the late fifties showing an 80 year old miller doing his trade.
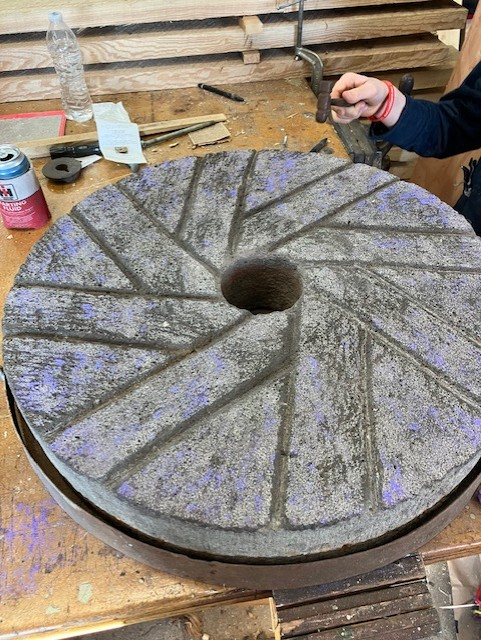
2nd, 3rd and fourth passes. Each round, I'd hammer down the high spots and re-strike until I was able to get a pretty flat, consistently chalk coverage. One thing this set of stones was missing was a 1 millimeter or so recess around the hub of each wheel, which helps direct grain into the wheels. This was added.
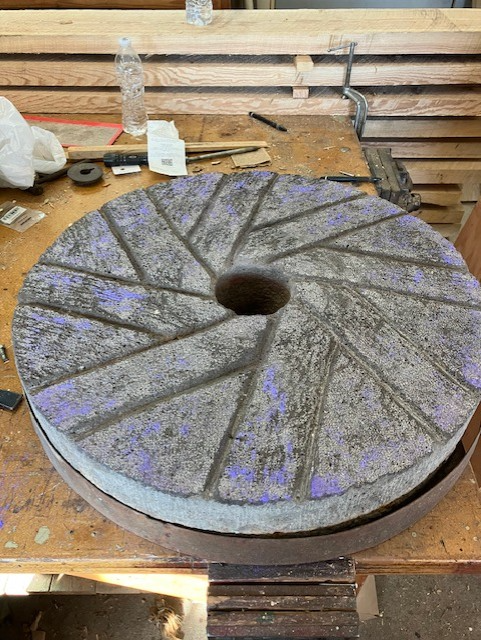
: Last pass on the run stone. It took about six cycles on each stone to get what I was shooting for. Each pass took about 20 minutes to hammer out.
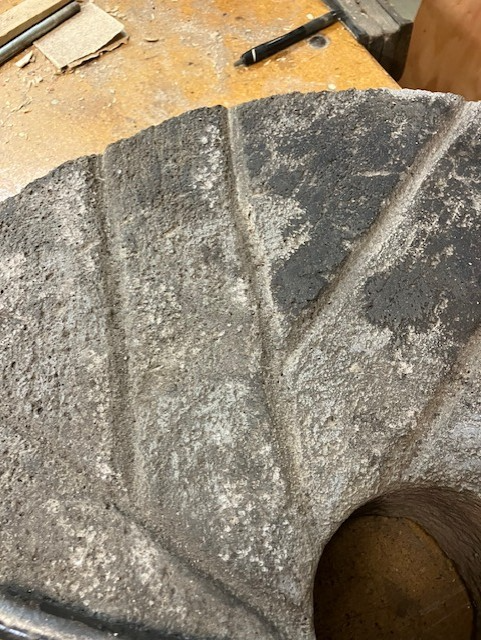
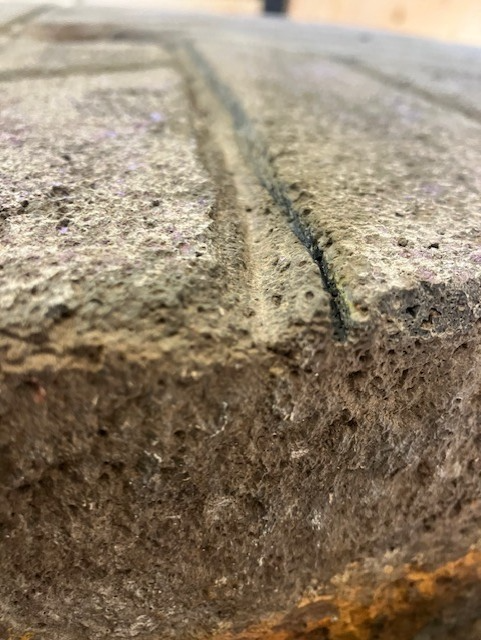
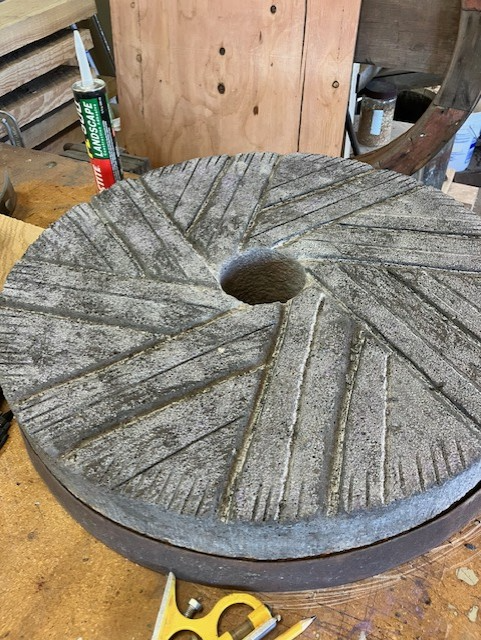
The furrows (grooves) are separated by the "land", which was the purple chalk areas that were leveled. The furrows on these wheels were V shaped, and are incorrect from everything I've read...presumably sharpened by someone who did not have access to proper info. On the right, in black marker, you can see the V. On the left, a properly shaped furrow with a vertical "breast" on the trailing edge of the furrow. These are laid out so grain goes between stone's matching furrows and gets sheared off like a scissors, not crushed and rolled. When grain comes out warm and sticky out of the mill, you know stones are getting dull. A hand cut/dressed stone, which reveals new stone cutting edges, can be good for up to one million pounds of grain. A ground stone, which I first tried but did not like, is usually good for up to 200,000 pounds of grain.
Since I had to totally recut the breast edge, I opted for a diamond cutting wheel on a right angle grinder to get the bulk of the profile cut.
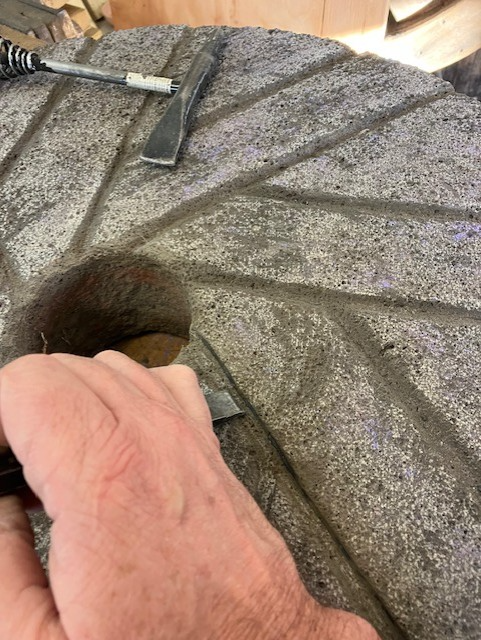
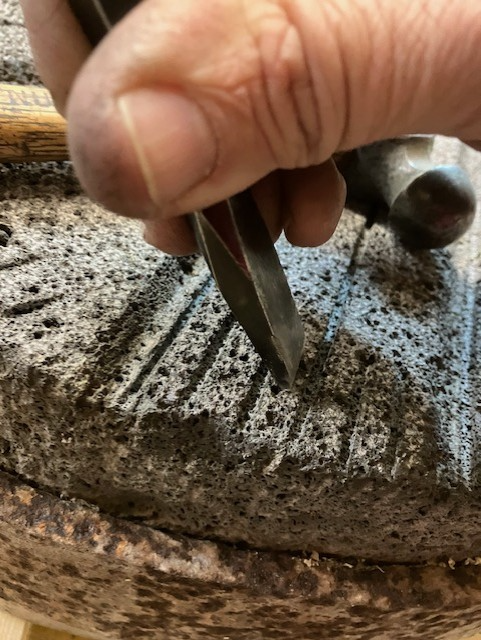
Miller's tools were of "a special hardened steel" that I'm sure was hard to come by back in the day, but readily available today. Here, a modified cold chisel is used at the desired furrow bevel angle to rough out the furrow.
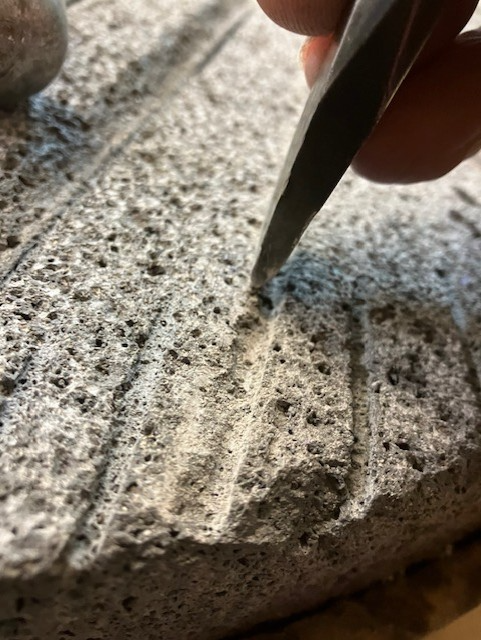
A close up view of initial furrow bevel cut , along with added partial "fly" cuts around perimeter to aid in flour's exit from stones.
Here chisel is held 90 degrees to furrow's desired finish face and stone grit is just slowly tapped out into a smooth, consistent surface. Complete dressing time was about 7 hours per wheel.
Here is nearly completed runner stone with additional flys cut into it. The more flys and furrows, the finer the flour.
Here is bed stone glued down into foundation. A wood ring surrounds it, just below stone's face, and that is what flour lands on, and is eventually swept off into a pail.
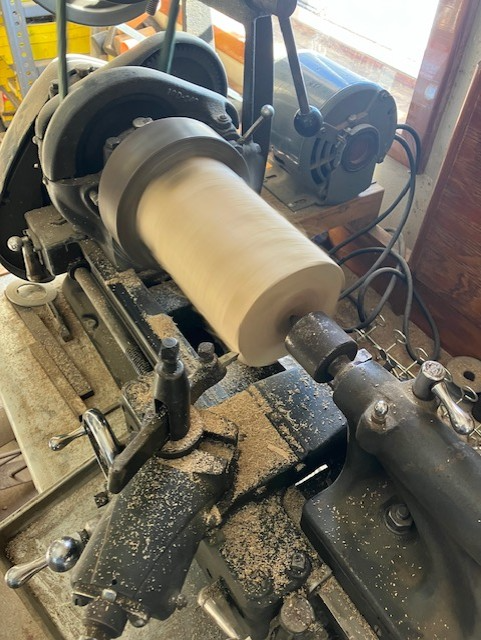
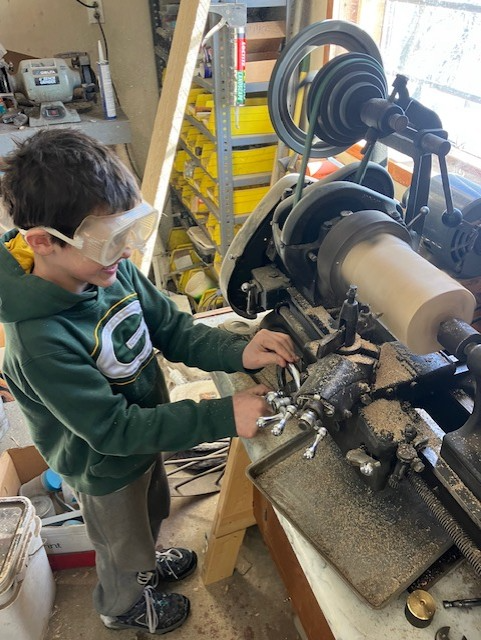
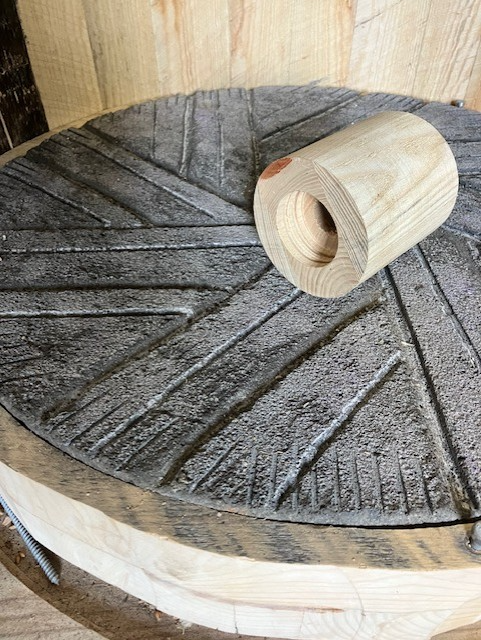
A plug was turned on my metal lathe (with a little help) to fill in the hole inside the bed stone. A hole was bored up the center for balancing bolt.screw to engage the run stone. Without this plug, entire center cavity would have to fill up with grain before reaching the stone's cutting surfaces.
Here is the finished eye plug before and after being installed. The recessed hole in the second picture clears the nut on the screw shaft.
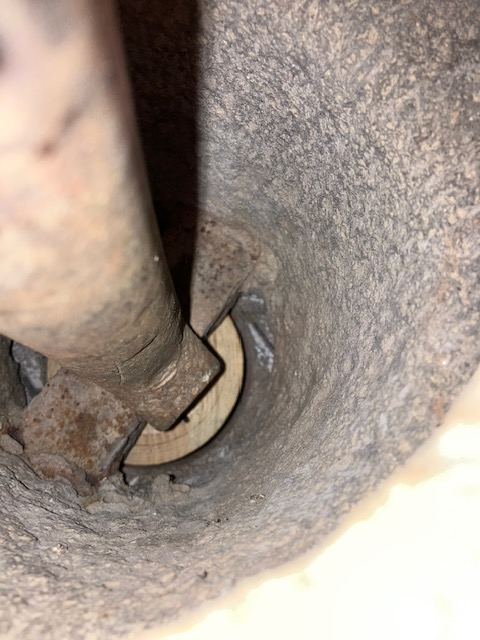
Here is a view looking down the damsel shaft, where the damsel yoke engages cross bar on run stone. You can see the eye plug below that yet. There is 13 1/2" worth of stone thickness total.
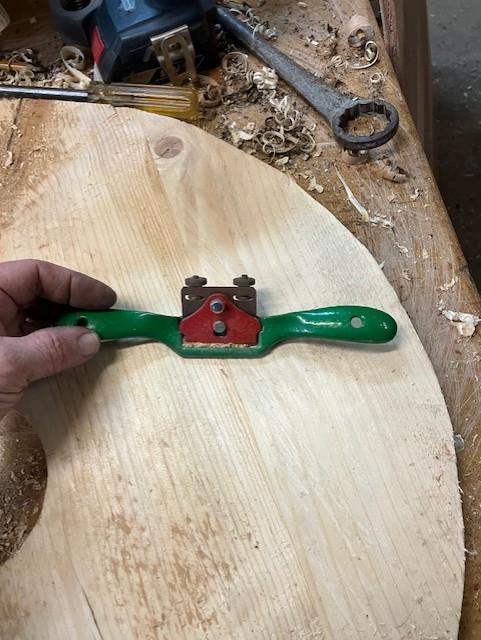
Went old school on this, no sandpaper allowed. A block plane and draw shave were used to give all edges and surfaces an authentic look.
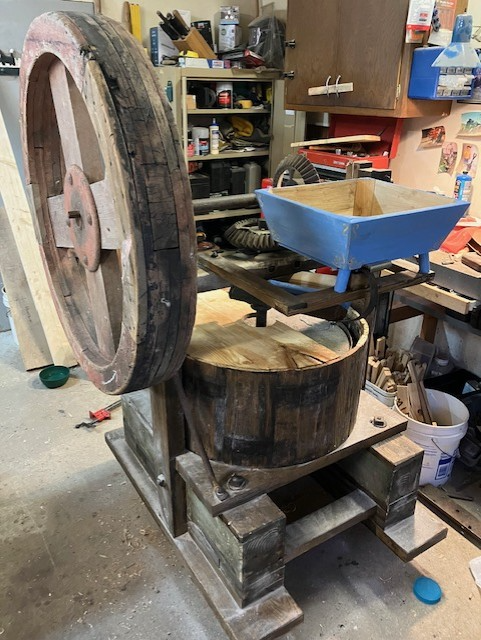
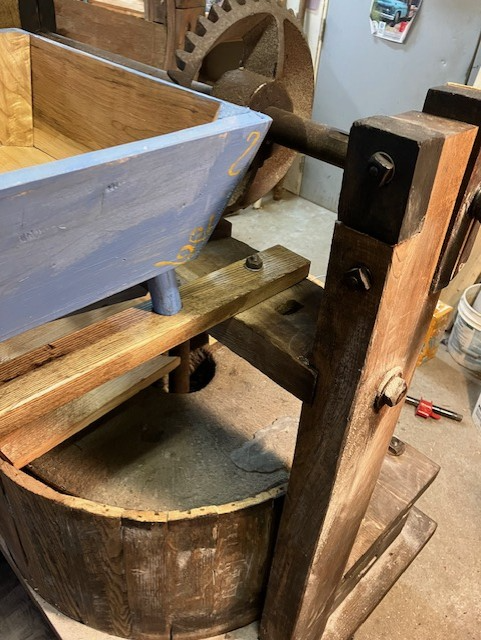
Here is the mill fully assembled, with a painted and pinstriped hopper and wood hinged sample door on front. It was finished with a boiled linseed oil and stain mix to combat wood worms, and then rubbed down with ashes to age it. Any place where grain touches is straight boiled linseed oil, and wherever finished flour touches is not finished at all. The skirt cover is in two halves, so people can see the run stone rotate, and so we can easily tear it down by removing four screws for blow down to clean. You can see a piece of wire (that needs to be replaced with a piece of leather shoelace) that holds the grain chute tight to the damsel wheel, allowing it to be constantly tapped to regulate grain flow into stones.
Here's what we will be seeing when it's under power.